Category:FireRed and LeafGreen maps
From Bulbagarden Archives
Jump to navigationJump to search
The following are maps from the Generation III games, Pokémon FireRed and LeafGreen.
Media in category "FireRed and LeafGreen maps"
The following 159 files are in this category, out of 359 total.
(previous page) (next page) Pokémon Mansion 3F FRLG.png 608 × 400; 16 KB
 Pokémon Mansion B1F FRLG.png 608 × 560; 15 KB
 Pokémon Mansion FRLG.png 112 × 86; 4 KB
 Pokémon Net Center inside FRLG.png 304 × 176; 7 KB
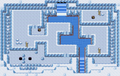
 Pokémon Tower 1F FRLG.png 304 × 312; 4 KB
 Pokémon Tower 2F FRLG.png 304 × 288; 4 KB
 Pokémon Tower 3F FRLG.png 304 × 288; 4 KB
 Pokémon Tower 4F FRLG.png 304 × 288; 4 KB
 Pokémon Tower 5F FRLG.png 304 × 288; 5 KB
 Pokémon Tower 6F FRLG.png 304 × 288; 4 KB
 Pokémon Tower 7F FRLG.png 304 × 288; 5 KB
 Pokémon Tower FRLG.png 110 × 240; 6 KB
 Power Plant exterior FRLG.png 176 × 108; 2 KB
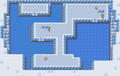
 Power Plant interior FRLG.png 784 × 640; 47 KB
 Professor Oak Lab FRLG.png 187 × 158; 4 KB
 Professor Oak Lab inside FRLG.png 208 × 224; 3 KB
 Quest Island.png 2,688 × 2,880; 284 KB
 Record Corner RSE FRLG.png 208 × 160; 3 KB
 Red House exterior FRLG.png 240 × 160; 11 KB
 ResortGorgeous.png 1,152 × 320; 48 KB
 Rock Tunnel 1F FRLG.png 768 × 640; 75 KB
 Rock Tunnel B1F FRLG.png 768 × 640; 78 KB
 Rocket Hideout B1F FRLG.png 448 × 544; 19 KB
 Rocket Hideout B2F FRLG.png 512 × 352; 18 KB
 Rocket Hideout B3F FRLG.png 352 × 432; 14 KB
 Rocket Hideout B4F FRLG.png 384 × 432; 7 KB
 Rocket Warehouse Map.png 464 × 432; 18 KB
 Ruby Path 1F FRLG.png 432 × 304; 15 KB
 Ruby Path B1F FRLG.png 305 × 368; 24 KB
 Ruby Path B2F FRLG.png 353 × 176; 18 KB
 Ruby Path B3F FRLG.png 496 × 368; 28 KB
 Ruby Path B4F FRLG.png 319 × 272; 4 KB
 Ruby Path B5F FRLG.png 256 × 240; 6 KB
 Ruin Valley.png 768 × 640; 93 KB
 Safari Zone area 1 FRLG.png 864 × 560; 73 KB
 Safari Zone area 2 FRLG.png 912 × 640; 91 KB
 Safari Zone area 3 FRLG.png 768 × 576; 68 KB
 Safari Zone entrance FRLG.png 816 × 576; 65 KB
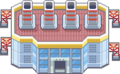
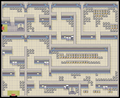
 Saffron City FRLG.png 1,056 × 880; 74 KB
 Saffron City unused FRLG.png 768 × 640; 42 KB
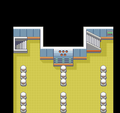
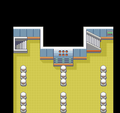
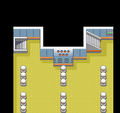
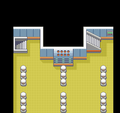
 Saffron Gym FRLG.png 464 × 388; 6 KB
 Saffron Trainer Fan Club FRLG.png 80 × 104; 2 KB
 Saffron Trainer Fan Club interior FRLG.png 176 × 272; 5 KB
 Sea Cottage FRLG.png 240 × 160; 5 KB
 Seafoam Islands 1F FRLG.png 608 × 384; 45 KB
 Seafoam Islands B1F FRLG.png 608 × 368; 44 KB
 Seafoam Islands B2F FRLG.png 608 × 384; 46 KB
 Seafoam Islands B3F FRLG.png 608 × 384; 47 KB
 Seafoam Islands B4F FRLG.png 608 × 384; 38 KB
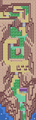 Sevault Canyon FRLG.png 384 × 1,280; 110 KB
 Seven Island.png 384 × 320; 27 KB
 Sevii Islands 1 2 and 3 Town Map.png 192 × 144; 2 KB
 Sevii Islands 4 and 5 Town Map.png 192 × 144; 2 KB
 Sevii Islands 6 and 7 Town Map.png 192 × 144; 2 KB
 Sevii Islands Altering Cave Map.png 192 × 144; 3 KB
 Sevii Islands Berry Forest Map.png 192 × 144; 3 KB
 Sevii Islands Birth Island Map.png 192 × 144; 1 KB
 Sevii Islands Bond Bridge Map.png 192 × 144; 3 KB
 Sevii Islands Canyon Entrance Map.png 192 × 144; 2 KB
 Sevii Islands Cape Brink Map.png 192 × 144; 2 KB
 Sevii Islands Dotted Hole Map.png 192 × 144; 1 KB
 Sevii Islands Five Island Map.png 192 × 144; 985 bytes
 Sevii Islands Five Isle Meadow Map.png 192 × 144; 2 KB
 Sevii Islands Four Island Map.png 192 × 144; 1,016 bytes
 Sevii Islands Green Path Map.png 192 × 144; 3 KB
 Sevii Islands Kindle Road Map.png 192 × 144; 3 KB
 Sevii Islands Lost Cave Map.png 192 × 144; 2 KB
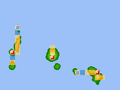
 Sevii Islands map.png 192 × 432; 8 KB
 Sevii Islands Memorial Pillar Map.png 192 × 144; 2 KB
 Sevii Islands Mt Ember Map.png 192 × 144; 3 KB
 Sevii Islands Navel Rock Map.png 192 × 144; 957 bytes
 Sevii Islands One Island Map.png 192 × 144; 1 KB
 Sevii Islands Outcast Island Map.png 192 × 144; 3 KB
 Sevii Islands Pattern Bush Map.png 192 × 144; 3 KB
 Sevii Islands Resort Gorgeous Map.png 192 × 144; 2 KB
 Sevii Islands Rocket Warehouse Map.png 192 × 144; 949 bytes
 Sevii Islands Ruin Valley Map.png 192 × 144; 3 KB
 Sevii Islands Sevault Canyon Map.png 192 × 144; 3 KB
 Sevii Islands Seven Island Map.png 192 × 144; 1 KB
 Sevii Islands Sevii Isle 22 Map.png 192 × 144; 2 KB
 Sevii Islands Sevii Isle 23 Map.png 192 × 144; 2 KB
 Sevii Islands Sevii Isle 24 Map.png 192 × 144; 2 KB
 Sevii Islands Sevii Isle 6 Map.png 192 × 144; 1 KB
 Sevii Islands Sevii Isle 7 Map.png 192 × 144; 1 KB
 Sevii Islands Sevii Isle 8 Map.png 192 × 144; 2 KB
 Sevii Islands Sevii Isle 9 Map.png 192 × 144; 2 KB
 Sevii Islands Six Island Map.png 192 × 144; 1 KB
 Sevii Islands Tanoby Key Map.png 192 × 144; 1 KB
 Sevii Islands Tanoby Ruins Map.png 192 × 144; 3 KB
 Sevii Islands Three Island Map.png 192 × 144; 1 KB
 Sevii Islands Three Isle Port Map.png 192 × 144; 2 KB
 Sevii Islands Trainer Tower Map.png 192 × 144; 16 KB
 Sevii Islands Treasure Beach Map.png 192 × 144; 2 KB
 Sevii Islands Two Island Map.png 192 × 144; 1 KB
 Sevii Islands Water Labyrinth Map.png 192 × 144; 2 KB
 Sevii Islands Water Path Map.png 192 × 144; 3 KB
 Sevii Isle 8 FRLG.png 1,344 × 320; 29 KB
 Sevii Isle 9 FRLG.png 384 × 960; 35 KB
 Silph Co 10F FRLG.png 272 × 304; 8 KB
 Silph Co 11F FRLG.png 272 × 320; 7 KB
 Silph Co 1F FRLG.png 576 × 352; 14 KB
 Silph Co 2F FRLG.png 576 × 352; 13 KB
 Silph Co 3F FRLG.png 576 × 352; 11 KB
 Silph Co 4F FRLG.png 576 × 352; 14 KB
 Silph Co 5F FRLG.png 576 × 352; 15 KB
 Silph Co 6F FRLG.png 496 × 304; 12 KB
 Silph Co 7F FRLG.png 496 × 304; 13 KB
 Silph Co 8F FRLG.png 496 × 304; 13 KB
 Silph Co 9F FRLG.png 496 × 304; 11 KB
 Silph Co FRLG.png 159 × 244; 2 KB
 Six Island.png 384 × 480; 34 KB
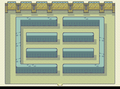
 SS Anne 1F FRLG.png 576 × 576; 3 KB
 SS Anne 1F Rooms FRLG.png 880 × 144; 4 KB
 SS Anne 2F FRLG.png 544 × 256; 4 KB
 SS Anne 2F Rooms FRLG.png 752 × 144; 5 KB
 SS Anne 3F FRLG.png 1,221 × 472; 12 KB
 SS Anne Basement FRLG.png 368 × 112; 2 KB
 SS Anne Basement Rooms FRLG.png 624 × 144; 4 KB
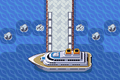 SS Anne FRLG.png 240 × 160; 7 KB
 Tanoby Key FRLG.png 240 × 256; 15 KB
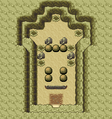
 Tanoby Ruins Dilford Chamber.png 368 × 272; 8 KB
 Tanoby Ruins FRLG.png 2,304 × 320; 38 KB
 Tanoby Ruins Liptoo Chamber.png 368 × 272; 8 KB
 Tanoby Ruins Monean Chamber.png 368 × 272; 8 KB
 Tanoby Ruins Rixy Chamber.png 368 × 272; 8 KB
 Tanoby Ruins Scufib Chamber.png 368 × 272; 9 KB
 Tanoby Ruins Viapois Chamber.png 368 × 272; 8 KB
 Tanoby Ruins Weepth Chamber.png 368 × 272; 8 KB
 Three Island.png 384 × 640; 45 KB
 Three Isle Path Complete.png 480 × 112; 9 KB
 Three Isle Path under construction.png 480 × 112; 5 KB
 ThreeIslePort.png 768 × 320; 39 KB
 Trainer Tower Entrance.png 304 × 272; 8 KB
 Trainer Tower Floor 1.png 288 × 272; 5 KB
 Trainer Tower Floor 2.png 288 × 272; 6 KB
 Trainer Tower Floor 3.png 288 × 272; 6 KB
 Trainer Tower Floor 4.png 288 × 272; 6 KB
 Trainer Tower Floor 5.png 288 × 272; 6 KB
 Trainer Tower Floor 6.png 288 × 272; 6 KB
 Trainer Tower Floor 7.png 288 × 272; 6 KB
 Trainer Tower Floor 8.png 288 × 272; 6 KB
 Trainer Tower FRLG.png 1,920 × 640; 105 KB
 Trainer Tower Rooftop.png 288 × 256; 5 KB
 TreasureBeach.png 384 × 640; 42 KB
 Two Island.png 768 × 320; 42 KB
 Underground Path 5-6 FRLG.png 128 × 1,008; 8 KB
 Underground Path 7-8 FRLG.png 1,280 × 112; 5 KB
 Union Room FRLG.png 240 × 192; 3 KB
 Vermilion City FRLG.png 768 × 640; 77 KB
 Vermilion Gym FRLG.png 176 × 324; 3 KB
 Vermilion Harbor FRLG.png 1,120 × 512; 13 KB
 Victory Road 1F FRLG.png 768 × 352; 41 KB
 Victory Road 2F FRLG.png 848 × 368; 56 KB
 Victory Road 3F FRLG.png 736 × 368; 49 KB
 Viridian City FRLG.png 768 × 640; 83 KB
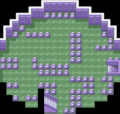
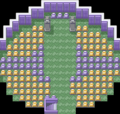
 Viridian Forest FRLG.png 864 × 1,104; 147 KB
 Viridian Gym FRLG.png 320 × 372; 6 KB
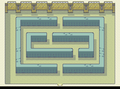
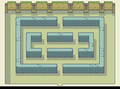
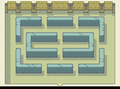
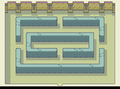
 Water Labyrinth FRLG.png 1,152 × 320; 40 KB
 Water Path FRLG.png 384 × 1,600; 118 KB


