Category:Sevii Islands maps
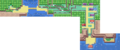
The following are maps of the Sevii Islands
Media in category "Sevii Islands maps"
The following 194 files are in this category, out of 194 total.
-
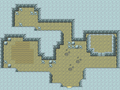 Altering Cave FRLG.png 512 × 384; 24 KB
-
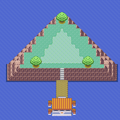
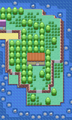
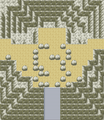
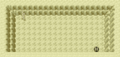
 Berry Forest.png 912 × 752; 114 KB
-
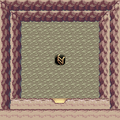
 Birth Island E.png 480 × 480; 21 KB
-
 Birth Island FRLG.png 480 × 480; 32 KB
-
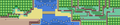 Bond Bridge FRLG.png 1,536 × 320; 76 KB
-
 Boon Island FRLG.png 768 × 960; 46 KB
-
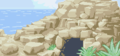
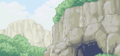
 Canyon Entrance FRLG.png 384 × 640; 48 KB
-
 Cape Brink FRLG.png 384 × 640; 35 KB
-
 Chrono Island.png 1,920 × 1,920; 156 KB
-
 Day Care 2 FRLG.png 192 × 144; 3 KB
-
 Dotted Hole B1F.png 208 × 176; 6 KB
-
 Dotted Hole B2F.png 208 × 176; 6 KB
-
 Dotted Hole B3F.png 208 × 176; 6 KB
-
 Dotted Hole B4F.png 208 × 176; 6 KB
-
 Dotted Hole Entrance.png 256 × 176; 9 KB
-
 Dotted Hole Sapphire.png 256 × 240; 11 KB
-
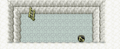
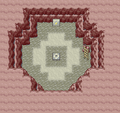
 Ember Spa.png 432 × 624; 34 KB
-
 Five Island FRLG.png 384 × 320; 22 KB
-
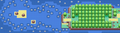
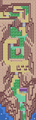
 Five Isle Meadow.png 384 × 640; 63 KB
-
 FL Altering Cave.png 240 × 112; 4 KB
-
 FL Berry Forest.png 240 × 112; 5 KB
-
 FL Dotted Hole.png 240 × 112; 7 KB
-
 FL Icefall Cave.png 240 × 112; 5 KB
-
 FL Lost Cave.png 240 × 112; 6 KB
-
 FL Mt. Ember.png 240 × 112; 4 KB
-
 FL Rocket Warehouse.png 240 × 112; 2 KB
-
 FL Tanoby Chambers.png 240 × 112; 7 KB
-
 FL Viridian Forest.png 240 × 112; 5 KB
-
 Fortune Island.png 1,536 × 3,200; 248 KB
-
 Four Island FRLG.png 768 × 640; 95 KB
-
 Gate inside E NR BI.png 272 × 208; 3 KB
-
 Gate inside FRLG Sevii.png 272 × 208; 3 KB
-
 Gate outside E NR BI.png 110 × 78; 2 KB
-
 Gate outside FRLG Sevii.png 112 × 76; 2 KB
-
 Green Path.png 1,152 × 320; 58 KB
-
 Icefall Cave Map Back.png 400 × 416; 18 KB
-
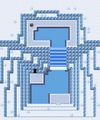
 Icefall Cave Map Base Floor.png 320 × 320; 25 KB
-
 Icefall Cave Map Down Floor.png 384 × 320; 22 KB
-
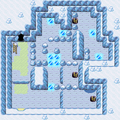
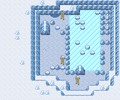
 Icefall Cave Map Entrance.png 480 × 576; 36 KB
-
 Joyful Game Corner Interior.png 192 × 160; 4 KB
-
 Joyful Game Corner.png 200 × 176; 5 KB
-
 Kin Island.png 2,304 × 960; 103 KB
-
 Kindle Road FRLG.png 384 × 2,240; 150 KB
-
 Knot Island FRLG.png 768 × 2,880; 144 KB
-
 Lost Cave 1F FRLG.png 176 × 176; 4 KB
-
 LostCaveC1.png 176 × 176; 4 KB
-
 LostCaveC10.png 176 × 176; 4 KB
-
 LostCaveC2.png 176 × 176; 5 KB
-
 LostCaveC3.png 176 × 176; 5 KB
-
 LostCaveC4.png 176 × 176; 5 KB
-
 LostCaveC5.png 176 × 176; 4 KB
-
 LostCaveC6.png 176 × 176; 5 KB
-
 LostCaveC7.png 176 × 176; 5 KB
-
 LostCaveC8.png 176 × 176; 4 KB
-
 LostCaveC9.png 176 × 176; 5 KB
-
 LostCaveCLax.png 176 × 176; 4 KB
-
 LostCaveCMaxRev.png 176 × 176; 4 KB
-
 LostCaveCRareCandy.png 176 × 176; 4 KB
-
 LostCaveCSea.png 176 × 176; 4 KB
-
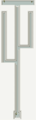
 Memorial Pillar.png 384 × 960; 64 KB
-
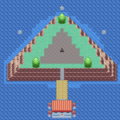
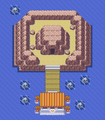
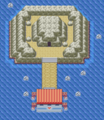
 Mt Ember FRLG.png 912 × 864; 44 KB
-
 Mt. Ember Summit FRLG.png 304 × 352; 16 KB
-
 Mt. Ember Summit Path 1F FRLG.png 240 × 288; 10 KB
-
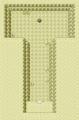
 Mt. Ember Summit Path 2F FRLG.png 768 × 736; 103 KB
-
 Mt. Ember Summit Path 3F FRLG.png 240 × 176; 8 KB
-
 Navel Rock B1F E.png 368 × 176; 4 KB
-
 Navel Rock B1F FRLG.png 272 × 112; 3 KB
-
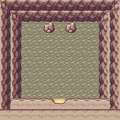
 Navel Rock Bottom E.png 352 × 352; 8 KB
-
 Navel Rock Bottom FRLG.png 336 × 368; 22 KB
-
 Navel Rock Crossroad E.png 432 × 1,376; 22 KB
-
 Navel Rock Crossroad FRLG.png 480 × 1,600; 25 KB
-
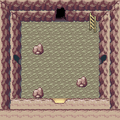
 Navel Rock E.png 336 × 384; 18 KB
-
 Navel Rock Entrance E.png 336 × 512; 8 KB
-
 Navel Rock Entrance FRLG.png 272 × 416; 6 KB
-
 Navel Rock FRLG.png 320 × 368; 11 KB
-
 Navel Rock Ladder Down E.png 144 × 1,418; 16 KB
-
 Navel Rock Ladder Down FRLG.png 112 × 1,242; 9 KB
-
 Navel Rock Ladder Up E.png 144 × 515; 7 KB
-
 Navel Rock Ladder Up FRLG.png 112 × 451; 4 KB
-
 Navel Rock Top E.png 400 × 448; 10 KB
-
 Navel Rock Top FRLG.png 304 × 400; 15 KB
-
 Netcenter.png 112 × 90; 54 KB
-
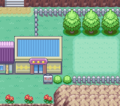
 One Island.png 384 × 320; 28 KB
-
 Outcast Island FRLG.png 384 × 1,280; 73 KB
-
 Pattern Bush FRLG.png 960 × 512; 43 KB
-
 Poké Mart interior FRLG.png 176 × 144; 5 KB
-
 Pokémon Center FRLG.png 80 × 70; 2 KB
-
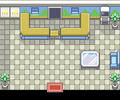
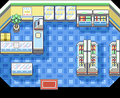
 Pokémon Center inside FRLG.png 240 × 160; 6 KB
-
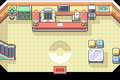
 Pokémon Net Center inside FRLG.png 304 × 176; 7 KB
-
 Quest Island.png 2,688 × 2,880; 284 KB
-
 ResortGorgeous.png 1,152 × 320; 48 KB
-
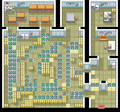 Rocket Warehouse Map.png 464 × 432; 18 KB
-
 Ruby Path 1F FRLG.png 432 × 304; 15 KB
-
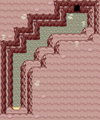
 Ruby Path B1F FRLG.png 305 × 368; 24 KB
-
 Ruby Path B2F FRLG.png 353 × 176; 18 KB
-
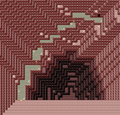
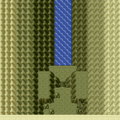
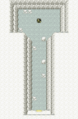
 Ruby Path B3F FRLG.png 496 × 368; 28 KB
-
 Ruby Path B4F FRLG.png 319 × 272; 4 KB
-
 Ruby Path B5F FRLG.png 256 × 240; 6 KB
-
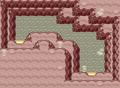
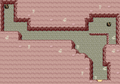
 Ruin Valley.png 768 × 640; 93 KB
-
 Sevault Canyon FRLG.png 384 × 1,280; 110 KB
-
 Seven Island.png 384 × 320; 27 KB
-
 Sevii Islands 1 2 and 3 Town Map.png 192 × 144; 2 KB
-
 Sevii Islands 4 and 5 Town Map.png 192 × 144; 2 KB
-
 Sevii Islands 6 and 7 Town Map.png 192 × 144; 2 KB
-
 Sevii Islands Altering Cave Map.png 192 × 144; 3 KB
-
 Sevii Islands Berry Forest Map.png 192 × 144; 3 KB
-
 Sevii Islands Birth Island Map.png 192 × 144; 1 KB
-
 Sevii Islands Bond Bridge Map.png 192 × 144; 3 KB
-
 Sevii Islands Canyon Entrance Map.png 192 × 144; 2 KB
-
 Sevii Islands Cape Brink Map.png 192 × 144; 2 KB
-
 Sevii Islands Dotted Hole Map.png 192 × 144; 1 KB
-
 Sevii Islands Five Island Map.png 192 × 144; 985 bytes
-
 Sevii Islands Five Isle Meadow Map.png 192 × 144; 2 KB
-
 Sevii Islands Four Island Map.png 192 × 144; 1,016 bytes
-
 Sevii Islands Green Path Map.png 192 × 144; 3 KB
-
 Sevii Islands Kindle Road Map.png 192 × 144; 3 KB
-
 Sevii Islands Lost Cave Map.png 192 × 144; 2 KB
-
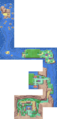
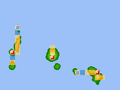
 Sevii Islands map.png 192 × 432; 8 KB
-
 Sevii Islands Memorial Pillar Map.png 192 × 144; 2 KB
-
 Sevii Islands Mt Ember Map.png 192 × 144; 3 KB
-
 Sevii Islands Navel Rock Map.png 192 × 144; 957 bytes
-
 Sevii Islands One Island Map.png 192 × 144; 1 KB
-
 Sevii Islands Outcast Island Map.png 192 × 144; 3 KB
-
 Sevii Islands Pattern Bush Map.png 192 × 144; 3 KB
-
 Sevii Islands Resort Gorgeous Map.png 192 × 144; 2 KB
-
 Sevii Islands Rocket Warehouse Map.png 192 × 144; 949 bytes
-
 Sevii Islands Ruin Valley Map.png 192 × 144; 3 KB
-
 Sevii Islands Sevault Canyon Map.png 192 × 144; 3 KB
-
 Sevii Islands Seven Island Map.png 192 × 144; 1 KB
-
 Sevii Islands Sevii Isle 22 Map.png 192 × 144; 2 KB
-
 Sevii Islands Sevii Isle 23 Map.png 192 × 144; 2 KB
-
 Sevii Islands Sevii Isle 24 Map.png 192 × 144; 2 KB
-
 Sevii Islands Sevii Isle 6 Map.png 192 × 144; 1 KB
-
 Sevii Islands Sevii Isle 7 Map.png 192 × 144; 1 KB
-
 Sevii Islands Sevii Isle 8 Map.png 192 × 144; 2 KB
-
 Sevii Islands Sevii Isle 9 Map.png 192 × 144; 2 KB
-
 Sevii Islands Six Island Map.png 192 × 144; 1 KB
-
 Sevii Islands Tanoby Key Map.png 192 × 144; 1 KB
-
 Sevii Islands Tanoby Ruins Map.png 192 × 144; 3 KB
-
 Sevii Islands Three Island Map.png 192 × 144; 1 KB
-
 Sevii Islands Three Isle Port Map.png 192 × 144; 2 KB
-
 Sevii Islands Trainer Tower Map.png 192 × 144; 16 KB
-
 Sevii Islands Treasure Beach Map.png 192 × 144; 2 KB
-
 Sevii Islands Two Island Map.png 192 × 144; 1 KB
-
 Sevii Islands Water Labyrinth Map.png 192 × 144; 2 KB
-
 Sevii Islands Water Path Map.png 192 × 144; 3 KB
-
 Sevii Isle 8 FRLG.png 1,344 × 320; 29 KB
-
 Sevii Isle 9 FRLG.png 384 × 960; 35 KB
-
 Six Island.png 384 × 480; 34 KB
-
 Tanoby Key FRLG.png 240 × 256; 15 KB
-
 Tanoby Ruins Dilford Chamber.png 368 × 272; 8 KB
-
 Tanoby Ruins FRLG.png 2,304 × 320; 38 KB
-
 Tanoby Ruins Liptoo Chamber.png 368 × 272; 8 KB
-
 Tanoby Ruins Monean Chamber.png 368 × 272; 8 KB
-
 Tanoby Ruins Rixy Chamber.png 368 × 272; 8 KB
-
 Tanoby Ruins Scufib Chamber.png 368 × 272; 9 KB
-
 Tanoby Ruins Viapois Chamber.png 368 × 272; 8 KB
-
 Tanoby Ruins Weepth Chamber.png 368 × 272; 8 KB
-
 Three Island.png 384 × 640; 45 KB
-
 Three Isle Path Complete.png 480 × 112; 9 KB
-
 Three Isle Path under construction.png 480 × 112; 5 KB
-
 ThreeIslePort.png 768 × 320; 39 KB
-
 Trainer Tower Double 1F FRLG.png 241 × 208; 2 KB
-
 Trainer Tower Double 2F FRLG.png 241 × 208; 3 KB
-
 Trainer Tower Double 3F FRLG.png 241 × 208; 4 KB
-
 Trainer Tower Double 4F FRLG.png 241 × 208; 9 KB
-
 Trainer Tower Double 5F FRLG.png 241 × 208; 10 KB
-
 Trainer Tower Double 6F FRLG.png 241 × 208; 10 KB
-
 Trainer Tower Double 7F FRLG.png 241 × 208; 10 KB
-
 Trainer Tower Double 8F FRLG.png 241 × 208; 13 KB
-
 Trainer Tower Entrance.png 304 × 272; 8 KB
-
 Trainer Tower FRLG.png 1,920 × 640; 105 KB
-
 Trainer Tower Knockout 1F FRLG.png 241 × 208; 2 KB
-
 Trainer Tower Knockout 2F FRLG.png 241 × 208; 3 KB
-
 Trainer Tower Knockout 3F FRLG.png 241 × 208; 4 KB
-
 Trainer Tower Knockout 4F FRLG.png 241 × 208; 8 KB
-
 Trainer Tower Knockout 5F FRLG.png 241 × 208; 9 KB
-
 Trainer Tower Knockout 6F FRLG.png 241 × 208; 9 KB
-
 Trainer Tower Knockout 7F FRLG.png 241 × 208; 10 KB
-
 Trainer Tower Knockout 8F FRLG.png 241 × 208; 12 KB
-
 Trainer Tower Rooftop.png 288 × 256; 5 KB
-
 Trainer Tower Single 1F FRLG.png 241 × 208; 2 KB
-
 Trainer Tower Single 2F FRLG.png 241 × 208; 3 KB
-
 Trainer Tower Single 3F FRLG.png 241 × 208; 3 KB
-
 Trainer Tower Single 4F FRLG.png 241 × 208; 6 KB
-
 Trainer Tower Single 5F FRLG.png 241 × 208; 7 KB
-
 Trainer Tower Single 6F FRLG.png 241 × 208; 7 KB
-
 Trainer Tower Single 7F FRLG.png 241 × 208; 7 KB
-
 Trainer Tower Single 8F FRLG.png 241 × 208; 8 KB
-
 TreasureBeach.png 384 × 640; 42 KB
-
 Two Island.png 768 × 320; 42 KB
-
 Union Room FRLG.png 240 × 192; 3 KB
-
 Water Labyrinth FRLG.png 1,152 × 320; 40 KB
-
 Water Path FRLG.png 384 × 1,600; 118 KB


